You have probably heared of the visual composer or the page builder for Wordpress. These tools allows you to create a custom page layout in your backend, which doesn’t looks like the common 2/3 wide blog with a 1/3 wide sidebar. The biggest advantage that these tools have is the ability to change the layout and the content from the backend without touching any line of code.
Problems with Page Builders
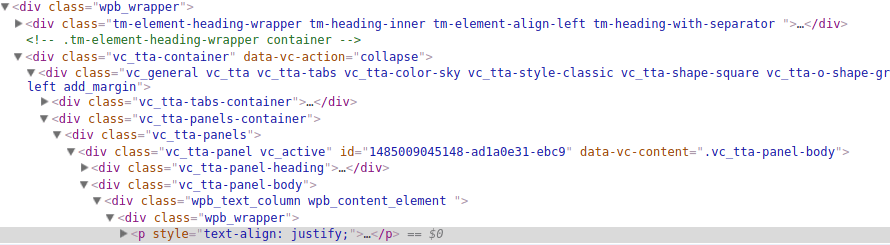
One main problem that these tools bring in is that they are very slow in handling. Every little change takes seconds until you can see the result, which is a huge slow down in the development process. The other drawback is the creation of massive overhead in the resulting HTML code. The content is nested in countless of cryptical div tags as you can see in the image below:
Alternative Approaches
What are the alternatives without loosing the convenience of the codeless editing? We widgetize our pages! Every component of the page is a widget and can be edited easily in the backend.
It must be said, that there is no completely codeless solution for this. The first layout must be written in code, but afterwards you or your client can manage the content from the widget area in the backend and will never see the code behind this.
Open your functions.php file in your current theme under /wp-content/theme/[YOUR_THEME] and search for ‘register_sidebar’. The widgets there are included in a function which has something like ‘widget_init’ or ‘register_widget’ in the name. Here is an example how it could look like:
function hotel_hamburg_widgets_init() {
    register_sidebar( array(
        'name'          => esc_html__( 'Sidebar', 'hotel-hamburg' ),
        'id'            => 'sidebar-1',
        'description'   => esc_html__( 'Add widgets here.', 'hotel-hamburg' ),
        'before_widget' => '<section id="%1$s" class="widget %2$s">',
        'after_widget'  => '</section>',
        'before_title'  => '<h2 class="widget-title">',
        'after_title'   => '</h2>',
    ) );
...
Copy the function register_sidebar including the last ‘);’ and paste it right before the closing curly bracket for the function. Change the name and the id of the widget and save the file:
function hotel_hamburg_widgets_init() {
    register_sidebar( array(
        'name'          => esc_html__( 'Sidebar', 'hotel-hamburg' ),
        'id'            => 'sidebar-1',
        'description'   => esc_html__( 'Add widgets here.', 'hotel-hamburg' ),
        'before_widget' => '<section id="%1$s" class="widget %2$s">',
        'after_widget'  => '</section>',
        'before_title'  => '<h2 class="widget-title">',
        'after_title'   => '</h2>',
    ) );
    register_sidebar( array(
        'name'          => esc_html__( 'MY_NEW_WIDGET', 'hotel-hamburg' ),
        'id'            => 'mynewwidget-1',
        'description'   => esc_html__( 'This is a new widget.', 'hotel-hamburg' ),
        'before_widget' => '<section id="%1$s" class="widget %2$s">',
        'after_widget'  => '</section>',
        'before_title'  => '<h2 class="widget-title">',
        'after_title'   => '</h2>',
    ) );
}
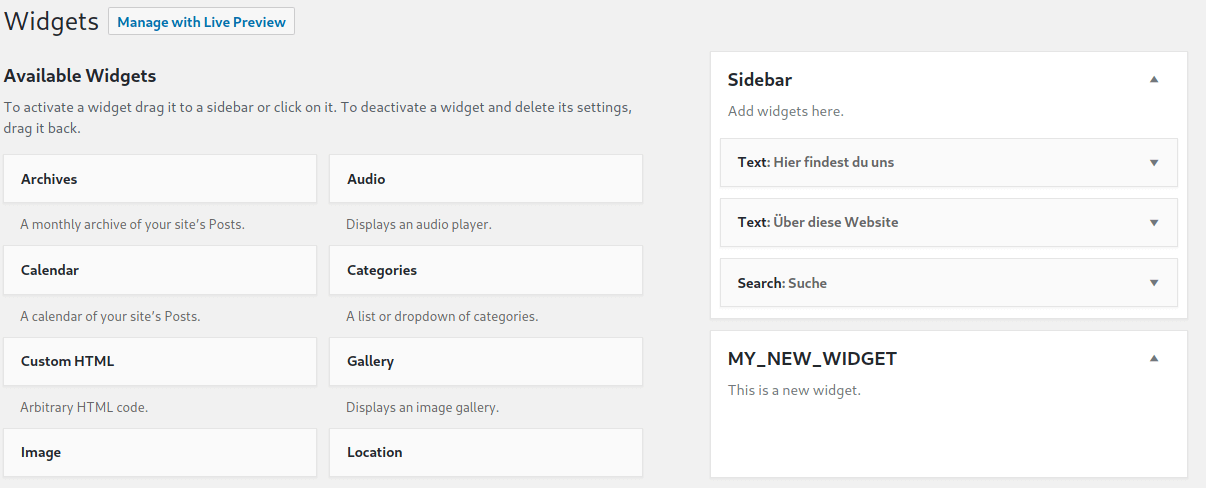
The widget now appears in your backend and you can assign any content to the widget, but it still is not shown up in the frontend. Let’s change this.
We need now a custom template for our widgetized page. Create a page template as described in the link. Don’t forget to set the page template in your page if you have set up a multiple purpose template!
Decide where you want to show up your widget in the page template and copy this code into it:
<?php if ( is_active_sidebar( 'mynewwidget-1' )): ?>
        <?php dynamic_sidebar( 'mynewwidget-1' ); ?>
<?php endif; ?>
Save your file and look at your new widgetized page. Change if necessary the before_widget, after_widget, before_title, after_title attributes for your needs and add some styles.